Setting UP and Implementing Hyper Web Application
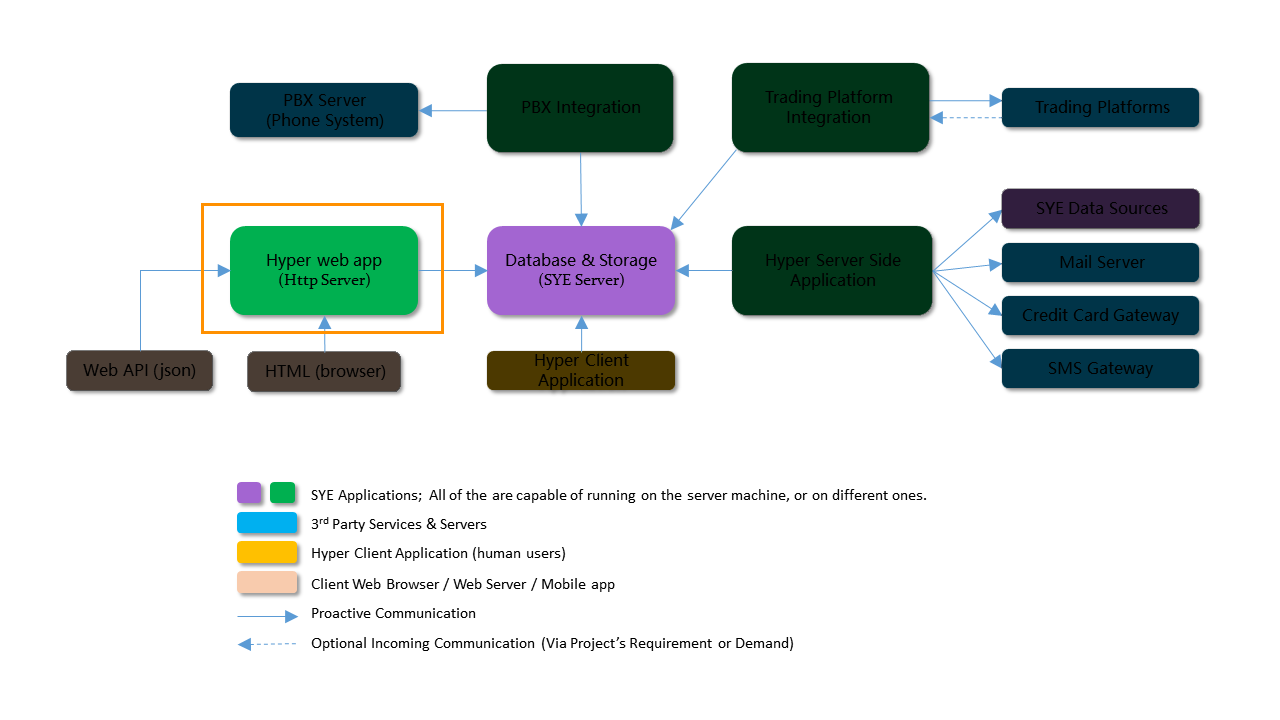
SYE Hyper is a system Comprised of a set of Applications as described in the diagram below.The System Applications communicate with Hyper Database (SYE Server).
This guide focuses on the "Hyper Web Application" that provides a "Middle Tier" interface to the Web\Internet in one of several ways.
- Default Web Portal: This is the default value. The application will operate as a self-service portal for customers and as a basic CRM for Hyper users.
- API mode: Identical to the first option, but in JSON API format instead of HTML pages. Any request to an HTML address will result in a "No Page" error message.
- Data Port Only: Intake of leads / customers / service calls / orders via public access suitable for landing pages and non-secured interfaces (requires a separate installation).
- Database Connection: Used to create a direct data pipe in JSON format against Hyper tables. Access permissions are defined in Hyper Client app, based on username and permission groups!
Secure Your Data and Scale Your Business
SYE Hyper’s architecture is built on a "Security-First" foundation, creating a vital barrier between the internet and your most valuable asset: your Database.By isolating the Web Application on its own dedicated infrastructure, you achieve a high level of stability and protection.
- Advanced Isolation: Keep your database shielded from public access through robust network segmentation.
- High Availability: Ensure your core systems remain operational and unaffected, even during peak traffic or targeted attacks.
- Global Reach: Deploy multiple Hyper Web Application instances worldwide with Geo-DNS routing for seamless load balancing.
- Localized Optimization: Hosting Web Applications closer to your target audience ensures a faster, more secure, and highly reliable user experience.
- Seamless Protection: Effortlessly integrate with industry-leading DDoS mitigation and security providers.
Installation Steps:
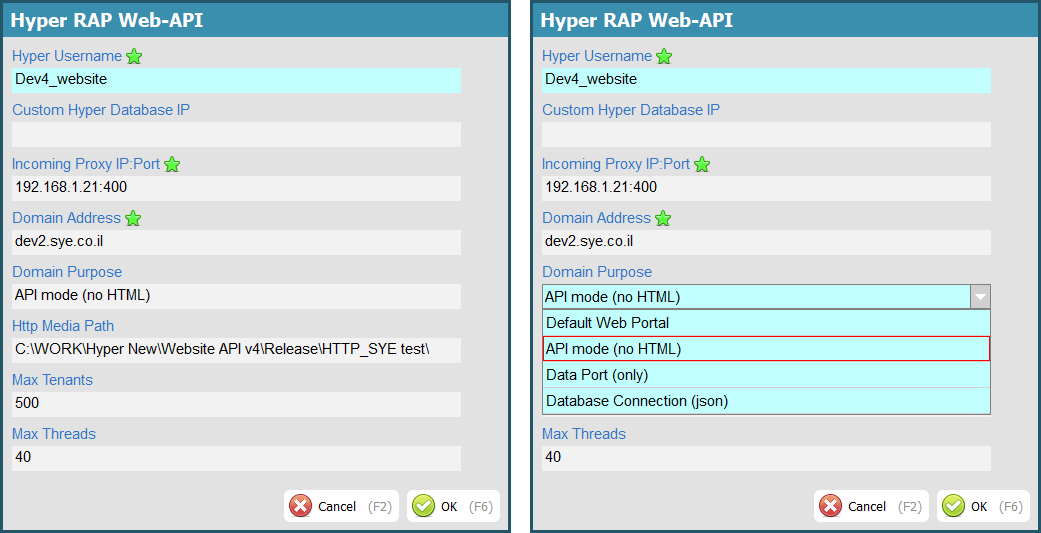
The following settings are required for both testing and production environments, where applicable.- Complete the basic "Fundamentals" settings in the "Server Side App & webAPI" window, as explained here.
- Install the web application on your web server as described in our Installation Guide.
- Configure DNS records to route traffic to the HTTP Web Server (Note: We recommend using a WAF or an equivalent protection/mitigation system).
- Complete the configuration steps outlined in chapters 1.2 – 1.6 of this manual.
- When implementing the system as a "Web Portal," customize the website CSS files and images on the server as desired.
- Thoroughly test every page in every supported language before going "live."